Showing posts with label Just For Fun Rubber Stamps. Show all posts

Friday, December 27, 2013

For All You Do

Hi creative Just For Fun bloggers. Linda here today to share another StampTangle card with you.


I stamped the pear with archival black ink on brown cs. I wanted to see how colored pencils looked on brown compared to black and I really liked the outcome. I used pink and light green pencils. To coordinate I used pink and green cs for the background. I divided the background by drawing a line in the center from top to bottom and then from side to side just above center. I took my quilting ruler and drew 45 degree lines. I cut the cs pieces and adhered to a piece of computer copy paper to eliminate bulk. Then it was run through my Cuttlebug with an embossing folder from Stampin' Up! and edged using a gold calligraphy marker. I wrapped the ribbon around this, tied knot and trimmed.
The sentiment was stamped on white cs and punched out with a decorative label punch, edged in light pink and attached over the ribbon. This entire piece was attached to a brown mat and then a pink mat. The pear was popped up onto the finished card.

Thanks so much for stopping by.
I love feedback from creative artists. Leave any comments below. 

Friday, December 20, 2013

Chickadee-dee-dee

Hi creative Just For Fun bloggers. Linda here to share a StampTangle Chickadee card with you today. 


 This is a 5 x 7 card (A7). I started by stamping the chickadee onto white cs using black archival ink. Once this was dry, I used colored pencils to spruce him/her up :)  Well, any well-rounded chickadee cannot be seen in public unless he/she is sitting proudly on a branch. I cut several branches from light brown cs using a Memory Box die. Then I added a bit of marking with my trusty colored pencils. The branch the chickadee is standing on is doubled up and offset just slightly. After all, this is quite a plump little chickadee. Guess it takes after me ha,ha,ha.

I wanted the chickadee to look like it was a caged bird so decided to use a Spellbinders lattice die. I cut one from rust cs and grunged it up a bit with brown distress ink. I turned it over to the back and penciled a line to cut out of the center area. I attached the lattice piece onto muted blue cs and then added the branches. This was then popped up onto another cs mat and then onto pewter-colored mirri card to add more light and depth to the card. The chickadee was added last. It was first formed by pushing down into the middle from the back to give some dimension. I added some pop dots in the middle area to make sure the dimension stayed that way, then glued down the tail, beak and feet areas.  Here is a closer look ......


Thanks so much for stopping by today. 
I love feedback from creative artists, so leave any comments below.  

Friday, December 6, 2013

Peace

Hi Bloggers. Hope all is well with you and yours.

I have a holiday card to share with you today. This is a new Just For Fun stamp, and it carries on with their StampTangle theme. I hope you like it.

Hmmmm, the colors on the background are not very true. So sorry for this. They look on the orange side but are definitely reds and greens. I used an alcohol background from my stash and ran it through a holiday embossing folder. Then I sanded it a bit to bring out the white of the card stock. Since the background was created on glossy card I stamped the Peace ornament (G3728) on glossy also using Stazon ink. I added color with markers and when dry, added gem and pearl embellishments. 
The ornament is popped up on the background and a bow glue-dotted to the hanger. The strips are glitter tape in white that I went over with the distress tool with distress ink on it. 

This is a nice sized ornament, approx 3 3/4" x 3". 

Thanks for stopping by and "see" you soon.....Linda 


Friday, November 22, 2013

Thanks for Everything

It's Friday and I have another Just For Fun Thanksgiving card to share with you today. 


I've done some layering on this one and I've used the Large StampTangle Pumpkin. I colored the pumpkin with my go-to medium, colored pencils. The sentiment was stamped with Archival black ink and distressed around the edges with vintage photo ink. I added a bit of Distress Stickles to the vines/leaves. 

Just to give you an idea of the size of the three pumpkins, I took a picture of the images I stamped onto white card stock. The largest one is approx. 3 1/2 x 4, medium is 2 3/4 x 2 1/4, and smallest 2 x 1 3/4. You can find them HERE.  


Thanks for stopping by...... Linda 

Friday, November 15, 2013

Glitter Thanksgiving Pumpkin


Happy Friday everyone,


If you like glitter, I'm thinking today's card is just for YOU. The focus on this card is the Just For Fun large stamptangle pumpkin. I just love the size of this stamp. Wouldn't this make just the biggest, best, pumpkin pie for Thanksgiving Day? 

I decided to stamp it on acetate using Stazon ink and then glue and glitter the BACK using USArtquest glue and glitter. It does take some time for this to dry (I waited overnight) but worth the wait. The frame around the pumpkin was die cut using Spellbinders dies and then popped up. The vine is a Memory Box die. I added a bit of Distress Stickles on the vine. The patterned paper to the left is from a BoBunny 6x6 pack and die cut from the same Spellbinders die. 


 It is hard to get the full impact of the glitter in a picture.....it is so very sparkly! 


Thanks so much for stopping by.  

Friday, November 8, 2013

Give Thanks

Happy Friday!  

I have a Thanksgiving card to share today. 

It's so hard now days not to go straight to Christmas after Halloween. And no wonder with the merchandising hype well in the groove. My husband now calls Thanksgiving "the forgotten holiday". Isn't that a sad thought. I try not to forget about giving thanks and take a break from whatever is going on in my life and reassess my priorities. 

The card I created for you uses the wonderful StampTangle medium pumpkin. I say "medium" because there are three sizes to choose from. And, as always, three choices of mounting.  I colored the pumpkin with colored pencils, die cut a vine and used an autumn paper for the background. The sentiment also came with the autumn paper and was popped up before attaching. Gold colored adhesive gems were added to each side of the sentiment. All is mounted onto a sage green card after adding a 5/8" wide ribbon in matching green.


I will be showing you the largest pumpkin on my next post Nov 18. Hope you stop by. Check out the other new StampTangle holiday stamps at Just For Fun Rubber Stamps

Thanks for stopping by.  Linda


Friday, November 1, 2013

Miss You

I'm trying to think warm, spring, sunny.... ha,ha,ha.  I know, it's a lost cause in Wisconsin at this time of year, but oh well. This card was created using Just For Fun rubber stamps. It is hard to see in this pic, but the background is a resist. 


If you are in the Madison, WI area the weekend of Nov 15-17, Just For Fun will be represented at the OOAK Rubber Stamp Convention. Click HERE to check out the convention site. 

Stamps Used: 
StampTangle Hen G3693 
Miss You A3679
StampTangle Pattern Block J3713

Next Friday I'll have a Thanksgiving idea for you.
Thanks for stopping by... Linda K

Monday, October 14, 2013

Stamp Club Challenge

Hi everyone. 

We had another challenge in stamp club and the theme was "spaghetti and meatballs". It was so much fun to see what everyone's take was on this so I took a picture of each project and I am sharing them with you. Hope you enjoy. OK, here we go.....

This is Glenda's hilarious take on the challenge. She has such a fun view on everything she makes so this didn't surprise me one bit and sure gave everyone a good laugh! 

This is a card and "tag" by Janice. She even drew her veggies on the tag. Good work girlfriend. The card she made reminded her of the colors found in spaghetti and meatballs and yet has a nice fall theme.
Well what goes best with spaghetti and meatballs?  Wine, of course. This is Stephanie's take on the challenge. Even the background paper has the spaghetti and meatball colors in it. We all got a kick out of her sentiment that was perfect for this card.
Wouldn't you just love it sit down at this table for the evening? The checked tablecloth actually pops off the card. And oh, I do love a good martini ")  The plate of spaghetti was done with tiny circle punches in brown, red ink splashed over and a white string squiggled among the "meatballs".  It's a master piece created by Julie. 
How cool is this card? It has meatballs all over it with a splash of sauce. This was created by Martha. 

See all the spaghetti swirled all over the embossed background? And the sauce and meatballs are represented by the reds in the flowers and the rusty arrow and mat. And you can't forget the parsley stems. This super card was created by Retta.

This is my take on the challenge. I used a Just for Fun stamp for the "plate" upon which the meatball flowers are sitting. The black checks are the tablecloth and the green leafs are the parsley. I found a menu in an old cookbook that I picked up at a thrift sale and it was falling apart. The menu actually had spaghetti and meatballs listed as a Dinner item. The book is actually copyright 1896, titled The Chicago Record Cook Book. Seasonable Inexpensive Bills of Fare for Every Day in the Year.  I started reading some of the recipes and was amazed at the good sounding meals. Everyday there is a menu and recipes for breakfast, luncheon and dinner. I'm enjoying going through this book. 


This is a closer look at what the menu for the day included; as you can see, it must have been a good one as there is "sauce" dripped all over it :)


I hope you enjoyed sharing our stamp club (The Rubber Band) challenge with us. I will post another challenge as we are meeting tonight and the challenge is DOILIES. Glenda found some old paper doilies at a sale and shared them with each of us. We'll see how many of us actually used one of these old doilies on their project or opted to keep them and use a current-day doily.  I know I DID.

Thanks so much for stopping by. "See" you soon. 

Friday, October 11, 2013

Colorful & Happy

Happy Friday bloggers,

I want to share a Just For Fun Rubber Stamp card with you today. I'm using the StampTangle Border 2. I hope you like it.


I stamped the border on white cs with archival black ink. When dry I cut one side and tore the other side. I added yellow gelato to all edges, spritzed with water and moved around with my finger. Next I added orange gelato and repeated the process. I stayed away from the stamped images as much as possible. I used purple gelato on the images, wet and spread pigment. I dried this very well using the heat gun. Blue colored pencil was added to some parts of the border. At this point I dabbed small spots of versamark ink onto the border and sprinkled white embossing powder and heated. 

Since I used bright colors to start, I thought the message Colorful & Happy... would be appropriate. It was stamped on yellow cs, die cut and edged with distress ink. A leaf flourish was die cut from purple cs and "married" to the tag. Both were attached to a piece of purple cs. Border strip was also attached and entire piece adhered to yellow and then orange. 


Thanks so much for stopping by. 
I love feedback from creative artists. Please leave any comments below. 

Friday, October 4, 2013

Chunky Toucans....

Hi everyone and Happy Friday to you

Well, this card is called Chunky Toucans; good thing these girls don't know it, right? Guess they are too busy chattering away about all that vital information. 

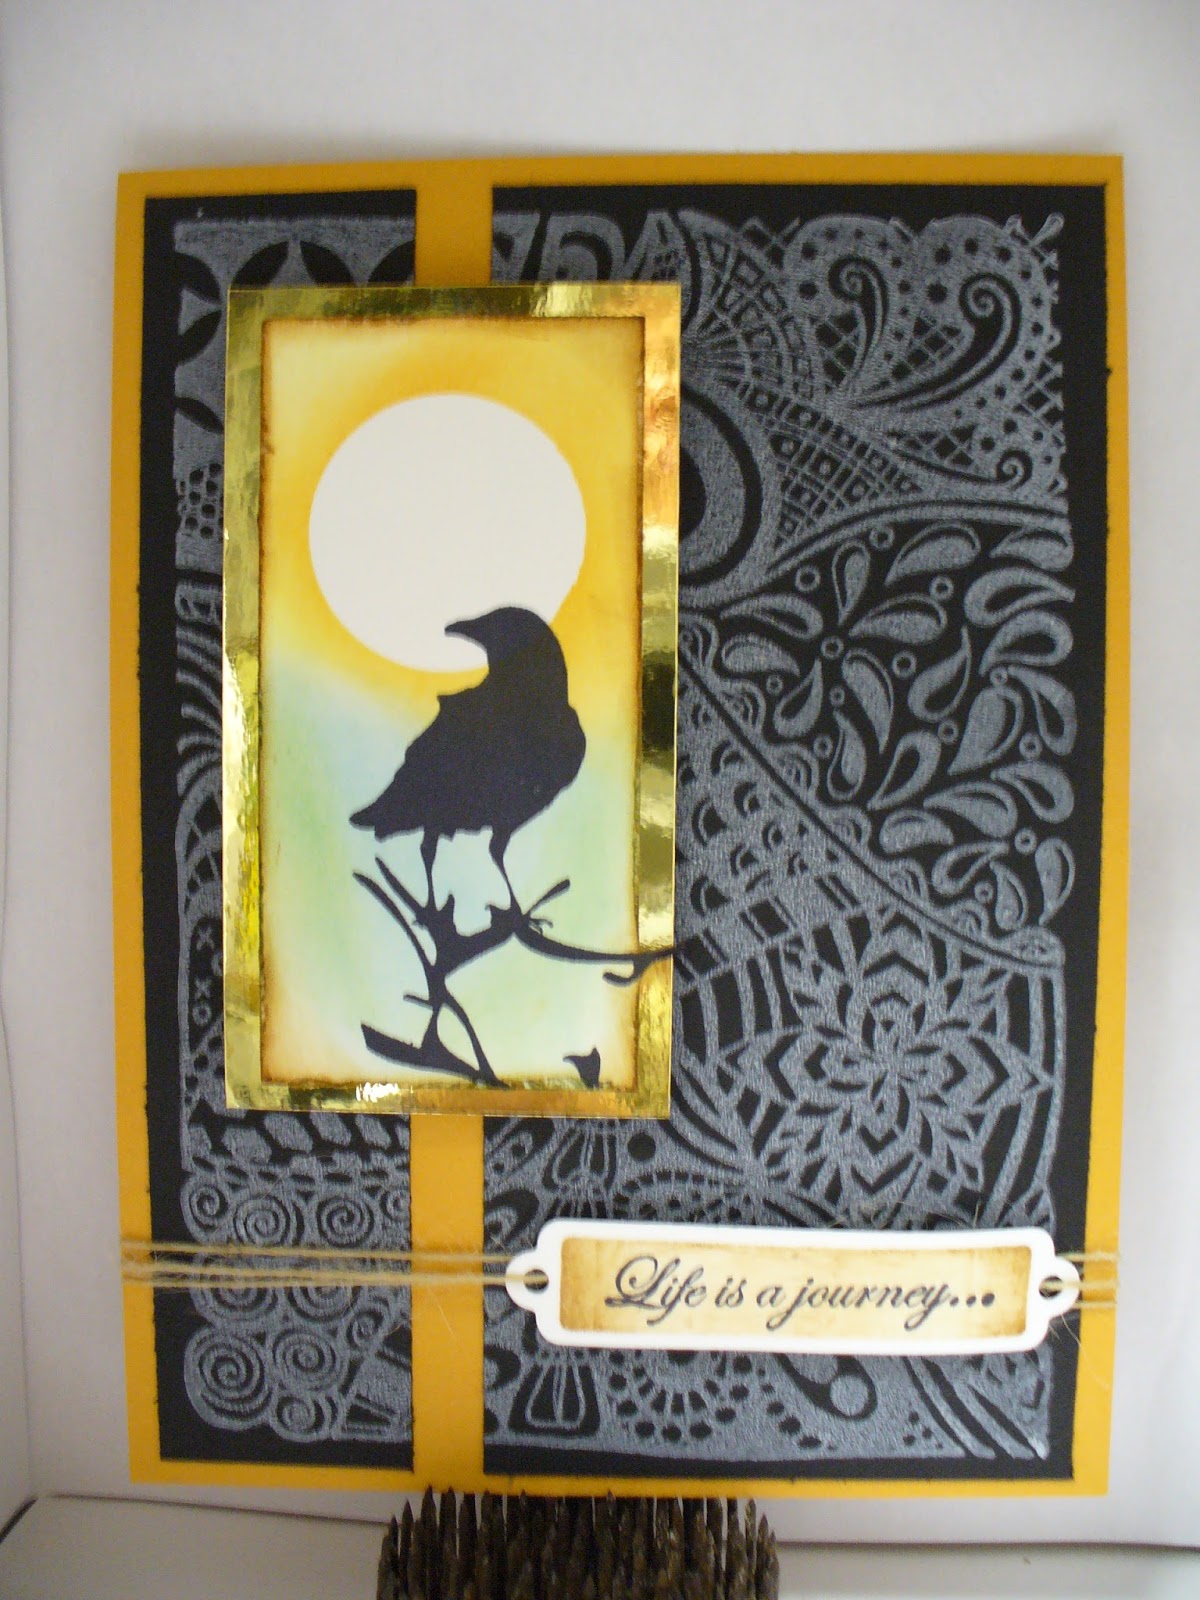
This is a taller card, about 7 1/2" x 4 1/4". I used two Spellbinders circle dies. The blue one was embossed with a swiss dots embossing folder. This nicely coordinates with the yellow dotted background paper. I rubbed distress ink around the yellow cs and wrapped a dotted ribbon and tied a bow prior to adhering it to the blue base. The blue circle was put down and then the "girls" were stamped on white cs, colored with Bic markers and cut using the next size smaller Spellbinders circle die than the blue circle. The gals were edged in yellow and popped up.  I stamped out "Girls Night" on white cs and cut out free-hand. It was edged in yellow and attached. 

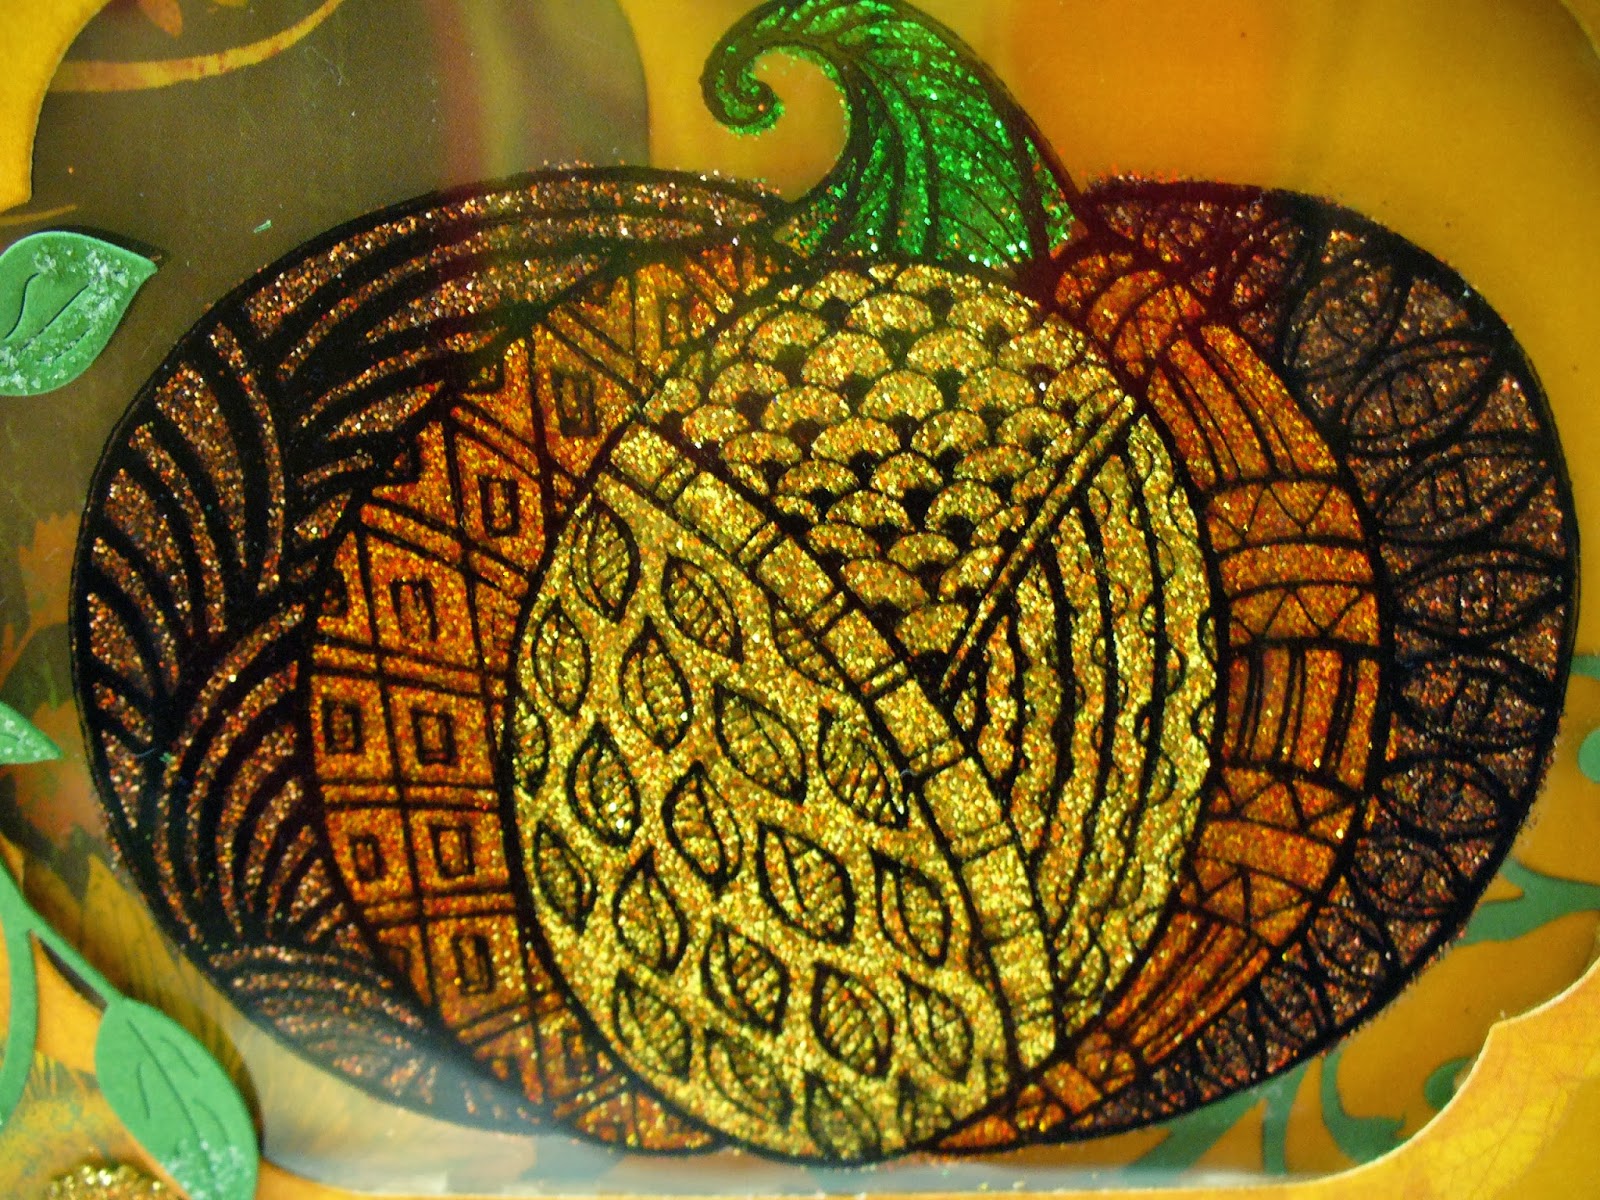
This is a closer look at the gals :) 

Stamps Used are from Just For Fun Rubber Stamps:

Thanks so very much for stopping by!  Hmmm, wonder what they are saying......

Friday, September 27, 2013

Turned Blackbird

Hi Everyone and happy Friday to you. 

I have a card for you today that hints of fall. The stamps I've used are from Just For Fun Rubber Stamps. 

The background stamp (J3713) was inked with white ink and stamped on black card stock. I cut 1/2" out of the background and then mounted it onto mustard cs, leaving the same amount of border all around. 

Next I punched a circle out of masking material, placed it onto white cs and rubbed over it with distress inks in honey and broken china. I then stamped the bird (D3703) image in black onto the distressed piece. I trimmed it to the size wanted, leaving just the tiny bit of branch in tact. I trimmed around this with my scissors. I mounted this completed piece onto gold mirri card. This was then popped up onto the card. 

I stamped the message (A3601) onto white cs and cut out using a Spellbinders tag die and inked with distress ink. It was popped up and natural twine was used to secure. 


Thanks so much for stopping by and don't forget to visit justforfunrubberstamps.blogspot.com for more inspiration