Friday, May 23, 2014
Friday, December 27, 2013
For All You Do
Hi creative Just For Fun bloggers. Linda here today to share another StampTangle card with you.
 I stamped the pear with archival black ink on brown cs. I wanted to see how colored pencils looked on brown compared to black and I really liked the outcome. I used pink and light green pencils. To coordinate I used pink and green cs for the background. I divided the background by drawing a line in the center from top to bottom and then from side to side just above center. I took my quilting ruler and drew 45 degree lines. I cut the cs pieces and adhered to a piece of computer copy paper to eliminate bulk. Then it was run through my Cuttlebug with an embossing folder from Stampin' Up! and edged using a gold calligraphy marker. I wrapped the ribbon around this, tied knot and trimmed.


The sentiment was stamped on white cs and punched out with a decorative label punch, edged in light pink and attached over the ribbon. This entire piece was attached to a brown mat and then a pink mat. The pear was popped up onto the finished card.
Just For Fun Stamps Used:
Thanks so much for stopping by.
I love feedback from creative artists. Leave any comments below.
Friday, December 20, 2013
Chickadee-dee-dee
Hi creative Just For Fun bloggers. Linda here to share a StampTangle Chickadee card with you today.
 This is a 5 x 7 card (A7). I started by stamping the chickadee onto white cs using black archival ink. Once this was dry, I used colored pencils to spruce him/her up :) Well, any well-rounded chickadee cannot be seen in public unless he/she is sitting proudly on a branch. I cut several branches from light brown cs using a Memory Box die. Then I added a bit of marking with my trusty colored pencils. The branch the chickadee is standing on is doubled up and offset just slightly. After all, this is quite a plump little chickadee. Guess it takes after me ha,ha,ha.
I wanted the chickadee to look like it was a caged bird so decided to use a Spellbinders lattice die. I cut one from rust cs and grunged it up a bit with brown distress ink. I turned it over to the back and penciled a line to cut out of the center area. I attached the lattice piece onto muted blue cs and then added the branches. This was then popped up onto another cs mat and then onto pewter-colored mirri card to add more light and depth to the card. The chickadee was added last. It was first formed by pushing down into the middle from the back to give some dimension. I added some pop dots in the middle area to make sure the dimension stayed that way, then glued down the tail, beak and feet areas. Here is a closer look ......


I wanted the chickadee to look like it was a caged bird so decided to use a Spellbinders lattice die. I cut one from rust cs and grunged it up a bit with brown distress ink. I turned it over to the back and penciled a line to cut out of the center area. I attached the lattice piece onto muted blue cs and then added the branches. This was then popped up onto another cs mat and then onto pewter-colored mirri card to add more light and depth to the card. The chickadee was added last. It was first formed by pushing down into the middle from the back to give some dimension. I added some pop dots in the middle area to make sure the dimension stayed that way, then glued down the tail, beak and feet areas. Here is a closer look ......

Just For Fun Stamps Used:
Thanks so much for stopping by today.
I love feedback from creative artists, so leave any comments below.
Friday, December 6, 2013
Peace
Hi Bloggers. Hope all is well with you and yours.
I have a holiday card to share with you today. This is a new Just For Fun stamp, and it carries on with their StampTangle theme. I hope you like it.
Hmmmm, the colors on the background are not very true. So sorry for this. They look on the orange side but are definitely reds and greens. I used an alcohol background from my stash and ran it through a holiday embossing folder. Then I sanded it a bit to bring out the white of the card stock. Since the background was created on glossy card I stamped the Peace ornament (G3728) on glossy also using Stazon ink. I added color with markers and when dry, added gem and pearl embellishments.
 The ornament is popped up on the background and a bow glue-dotted to the hanger. The strips are glitter tape in white that I went over with the distress tool with distress ink on it.
This is a nice sized ornament, approx 3 3/4" x 3".
Thanks for stopping by and "see" you soon.....Linda
I have a holiday card to share with you today. This is a new Just For Fun stamp, and it carries on with their StampTangle theme. I hope you like it.
Hmmmm, the colors on the background are not very true. So sorry for this. They look on the orange side but are definitely reds and greens. I used an alcohol background from my stash and ran it through a holiday embossing folder. Then I sanded it a bit to bring out the white of the card stock. Since the background was created on glossy card I stamped the Peace ornament (G3728) on glossy also using Stazon ink. I added color with markers and when dry, added gem and pearl embellishments.

This is a nice sized ornament, approx 3 3/4" x 3".
Thanks for stopping by and "see" you soon.....Linda
Friday, November 22, 2013
Thanks for Everything
It's Friday and I have another Just For Fun Thanksgiving card to share with you today.


I've done some layering on this one and I've used the Large StampTangle Pumpkin. I colored the pumpkin with my go-to medium, colored pencils. The sentiment was stamped with Archival black ink and distressed around the edges with vintage photo ink. I added a bit of Distress Stickles to the vines/leaves.
Just to give you an idea of the size of the three pumpkins, I took a picture of the images I stamped onto white card stock. The largest one is approx. 3 1/2 x 4, medium is 2 3/4 x 2 1/4, and smallest 2 x 1 3/4. You can find them HERE.

Thanks for stopping by...... Linda
Thursday, November 21, 2013
It's a Sunflower Day
Hi Everyone,
Want to share a bit of napkin art with you today. Yup, this card is made using a purchased napkin. If you haven't done this technique before I must warn you.....IT IS VERY ADDICTING.

At this time if you want to sprinkle on tiny mica chips, glitter, etc. do so while this is still wet. Set aside to dry. If you look at this card, in the right bottom corner you will see a silhouette. This is a die cut I added from black card stock....underneath the napkin!
Once dry, and it takes several hours, you can stamp on it. I matted this image onto a black mat, then onto a yellow base which I stamped onto using a script stamp.

PPA is my go-to medium for collage and protecting projects from the sun and water. It's like putting a little raincoat on your project. If you'd like to check it out, click HERE.
Tuesday Morning is a great place to pick up great napkins at a good price.
If you decide to give this a try, please let me know. I'd love to see what you create and how you like working with the napkins.
PS: I usually work on a craft sheet due to the adhesive use. You can also cut a
bag from Archiver's to set your art on to dry. Recycling is a good thing :)
Thanks for stopping by and I love comments. Have a great day. Linda K
Friday, November 15, 2013
Glitter Thanksgiving Pumpkin
Happy Friday everyone,
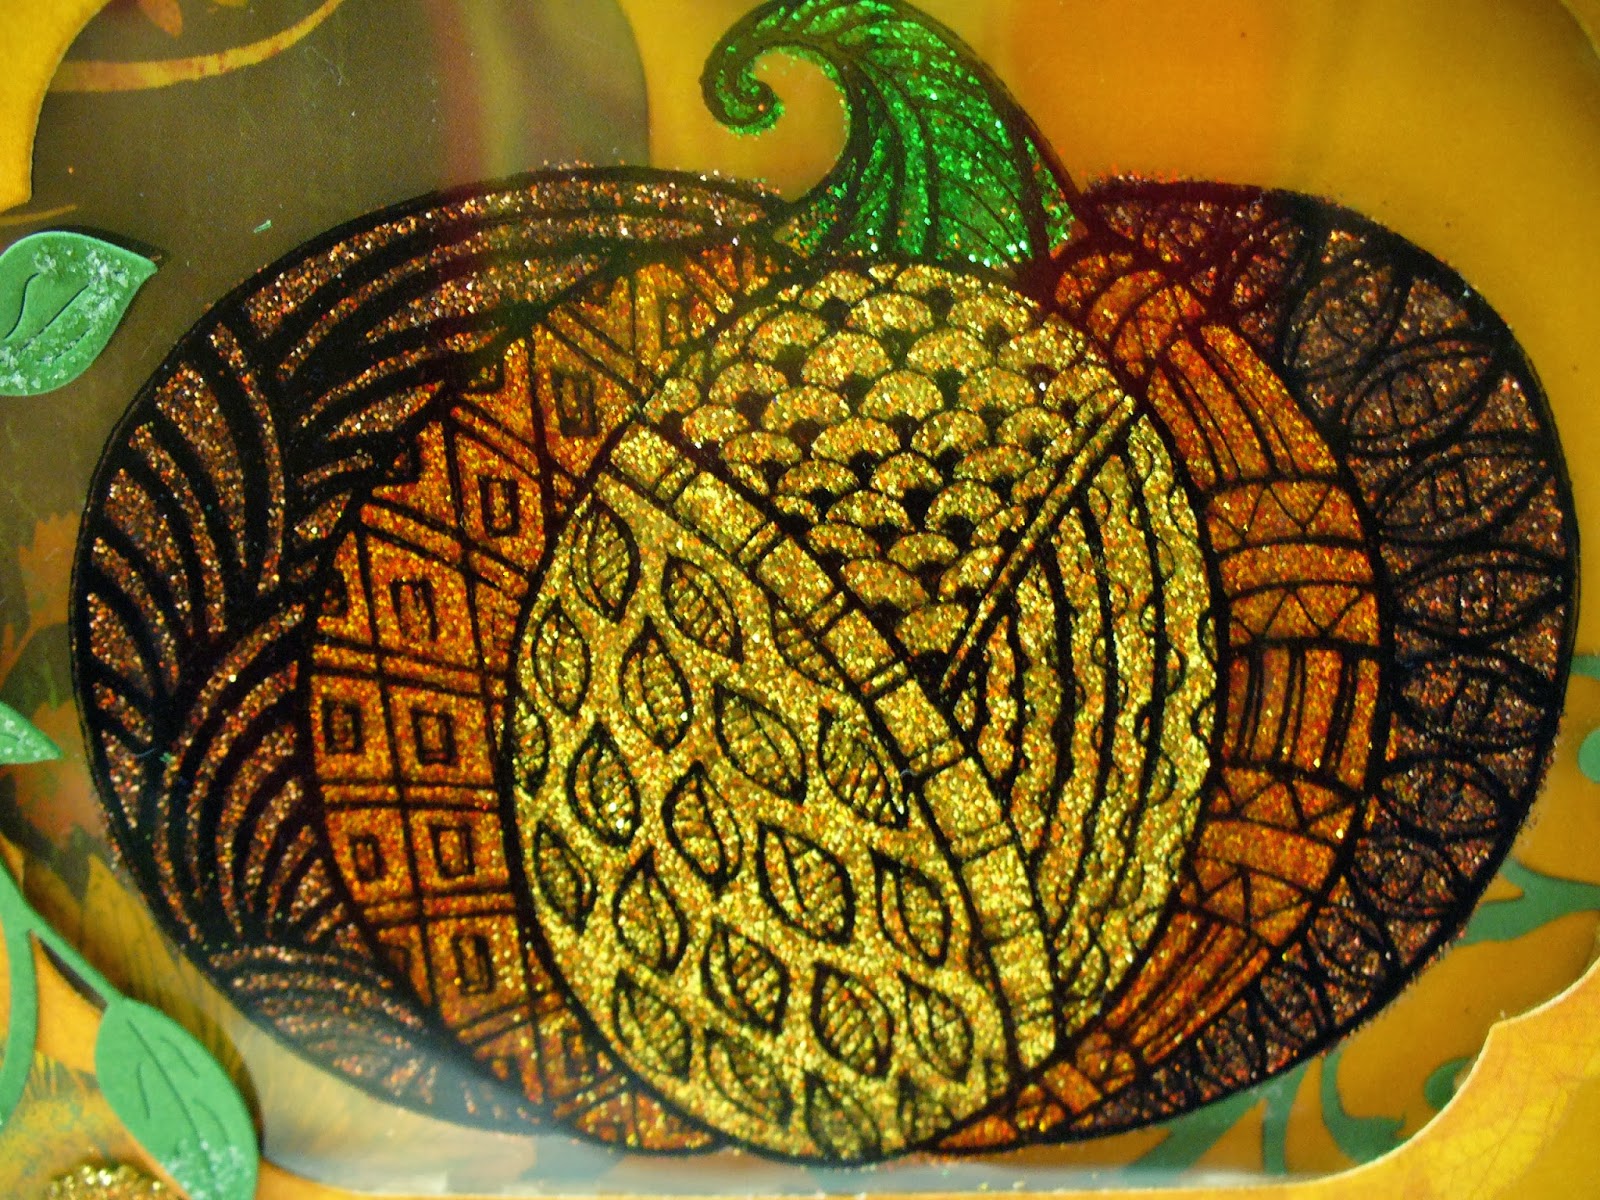
If you like glitter, I'm thinking today's card is just for YOU. The focus on this card is the Just For Fun large stamptangle pumpkin. I just love the size of this stamp. Wouldn't this make just the biggest, best, pumpkin pie for Thanksgiving Day?
I decided to stamp it on acetate using Stazon ink and then glue and glitter the BACK using USArtquest glue and glitter. It does take some time for this to dry (I waited overnight) but worth the wait. The frame around the pumpkin was die cut using Spellbinders dies and then popped up. The vine is a Memory Box die. I added a bit of Distress Stickles on the vine. The patterned paper to the left is from a BoBunny 6x6 pack and die cut from the same Spellbinders die.


Thanks so much for stopping by.
Subscribe to:
Posts (Atom)