Friday, November 22, 2013

Thanks for Everything

It's Friday and I have another Just For Fun Thanksgiving card to share with you today. 


I've done some layering on this one and I've used the Large StampTangle Pumpkin. I colored the pumpkin with my go-to medium, colored pencils. The sentiment was stamped with Archival black ink and distressed around the edges with vintage photo ink. I added a bit of Distress Stickles to the vines/leaves. 

Just to give you an idea of the size of the three pumpkins, I took a picture of the images I stamped onto white card stock. The largest one is approx. 3 1/2 x 4, medium is 2 3/4 x 2 1/4, and smallest 2 x 1 3/4. You can find them HERE.  


Thanks for stopping by...... Linda 

Thursday, November 21, 2013

It's a Sunflower Day

Hi Everyone, 

Want to share a bit of napkin art with you today. Yup, this card is made using a purchased napkin. If you haven't done this technique before I must warn you.....IT IS VERY ADDICTING.


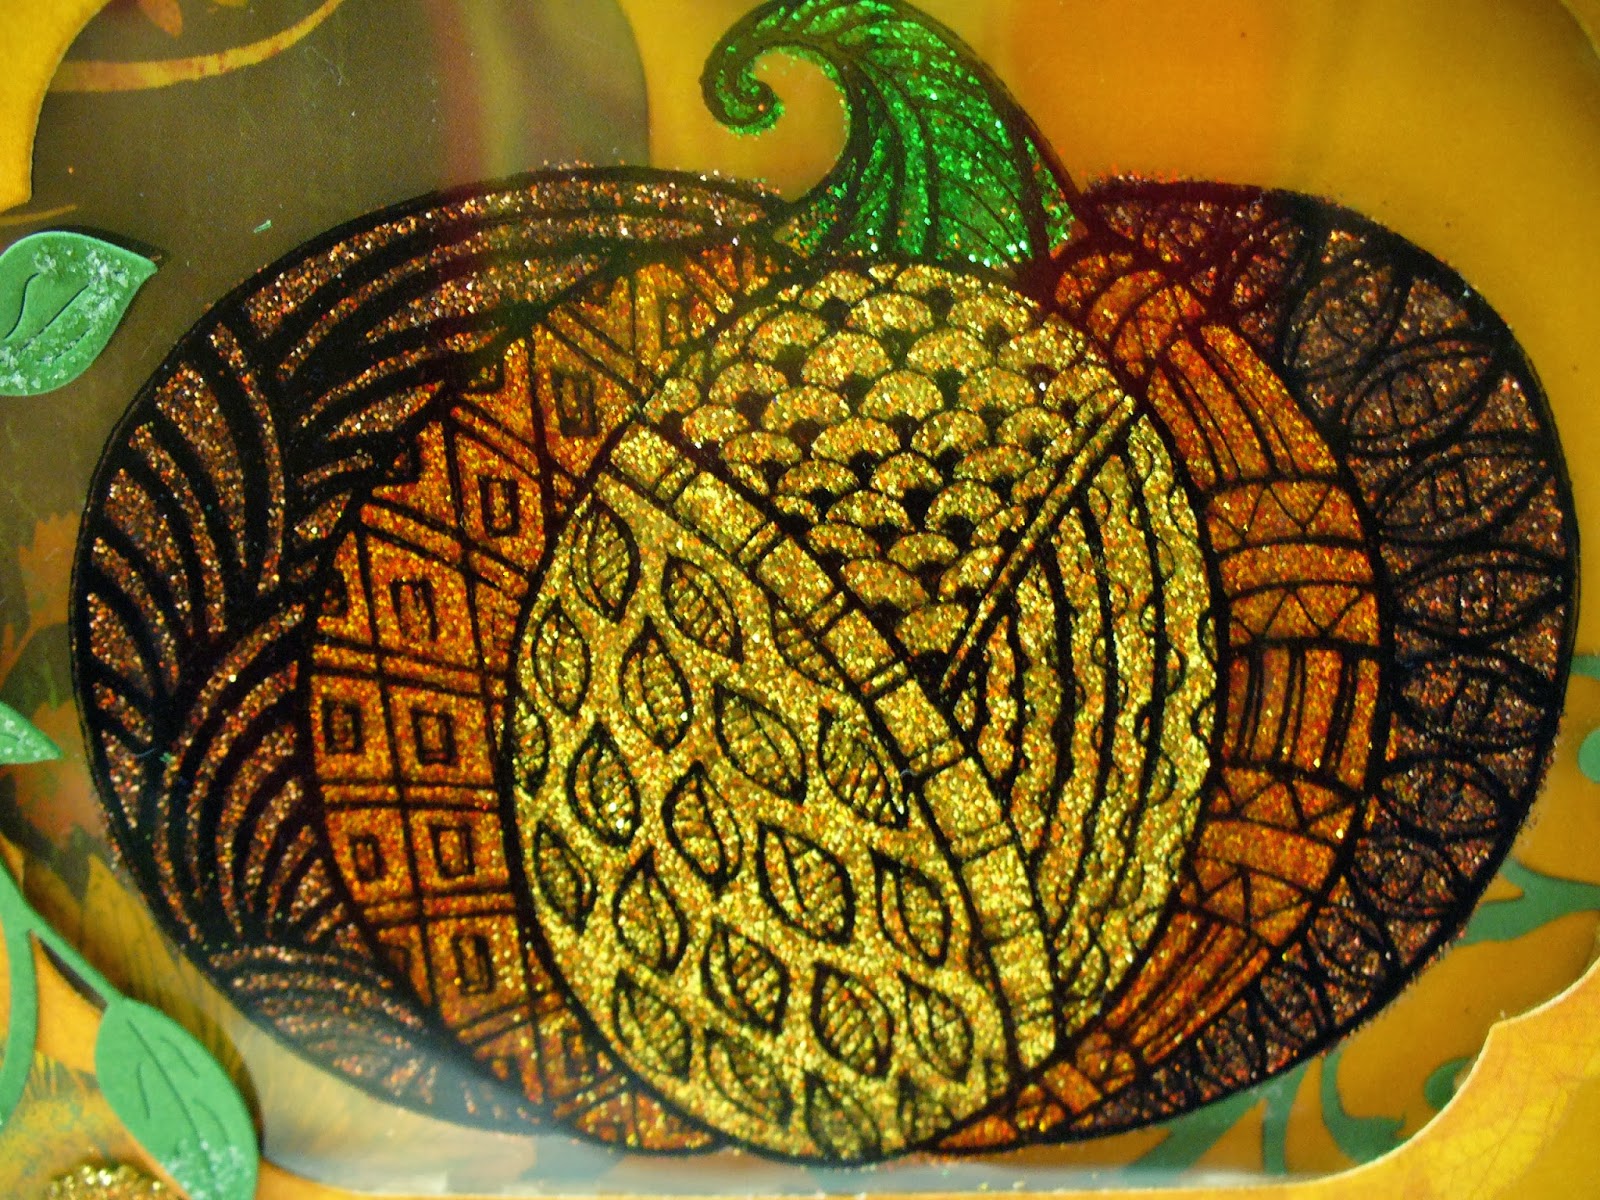
I love sunflowers so chose this napkin. It does have a bit of writing in the background too. The first thing you must do is separate the napkin layers; usually there is 2-3. All you want to keep is the layer with the image. I cut a piece of mat board the size wanted, but you could use chipboard or heavy card stock. Cut the napkin image piece about 1/2" larger than the piece of mat board. Brush PPA (Perfect Paper Adhesive) onto the mat board and lay on the napkin. Angle cut the corners of the napkin to remove some of the bulk. Now cover the top of the napkin with the PPA, turn over, brush around all four sides of the back and then use your brush to bring the napkin edges to the back. Brush over to smooth out. I hold in my hand while I am doing the entire procedure.

At this time if you want to sprinkle on tiny mica chips, glitter, etc. do so while this is still wet. Set aside to dry.  If you look at this card, in the right bottom corner you will see a silhouette. This is a die cut I added from black card stock....underneath the napkin! 

Once dry, and it takes several hours, you can stamp on it. I matted this image onto a black mat, then onto a yellow base which I stamped onto using a script stamp.  


PPA is my go-to medium for collage and protecting projects from the sun and water. It's like putting a little raincoat on your project. If you'd like to check it out, click HERE. 

Tuesday Morning is a great place to pick up great napkins at a good price. 

If you decide to give this a try, please let me know. I'd love to see what you create and how you like working with the napkins. 

PS:  I usually work on a craft sheet due to the adhesive use. You can also cut a
bag from Archiver's to set your art on to dry. Recycling is a good thing :) 

Thanks for stopping by and I love comments. Have a great day.  Linda K

Friday, November 15, 2013

Glitter Thanksgiving Pumpkin


Happy Friday everyone,


If you like glitter, I'm thinking today's card is just for YOU. The focus on this card is the Just For Fun large stamptangle pumpkin. I just love the size of this stamp. Wouldn't this make just the biggest, best, pumpkin pie for Thanksgiving Day? 

I decided to stamp it on acetate using Stazon ink and then glue and glitter the BACK using USArtquest glue and glitter. It does take some time for this to dry (I waited overnight) but worth the wait. The frame around the pumpkin was die cut using Spellbinders dies and then popped up. The vine is a Memory Box die. I added a bit of Distress Stickles on the vine. The patterned paper to the left is from a BoBunny 6x6 pack and die cut from the same Spellbinders die. 


 It is hard to get the full impact of the glitter in a picture.....it is so very sparkly! 


Thanks so much for stopping by.  

Sunday, November 10, 2013

Core'dinations Christmas Ornament

Quick update: I am excited to post that my ornament won in this challenge. Thanks to Jennifer and Core'dinations. 

Hi hard core croppers,

This is my submission for Jennifer Edwardson's challenge to make a Christmas ornament. 
 I made my own pattern for this ornament. It is ~5" high and 1 1/2" on each straight side on top. I traced the pattern on the back of gold smooth glitter paper and scored with the tip of my scissors lightly. I decided to use whitewash card stock with gold core. I ran through a holiday embossing folder and then placed the template on the back and cut out. Each of the four panels were spritzed with pearl mist. I added the panels while the ornament was flat. Tape was added to the end flap and the ornament folded together. Pearls were added to top edge and two holes punched on opposite sides to accommodate the ribbon handle which was threaded through and tied. 

 I threaded metallic thread through the inside of the ornament and out the tiny opening in the bottom. I tied a small loop to make a tassle, die cut two stars, xyroned them and sandwiched the thread loop between them. Lastly, added a sparkly embellishment to both sides of the stars.
Supplies Used:
Core'dinations whitewash collection - gold core
Core'dinations sanding block, dust cloth
Recollections - soft gold glitter paper and pearls
My own pattern for ornament
Ranger - perfect pearl mist
Xyron sticker maker
Sizzix embossing folder
Red line tape
Prima gems 
Stampin' Up! - 5/8" ribbon
On The Surface - gold metallic thread 

Core'dinations Christmas Card #2

Hi hard core croppers,

This is my second card for Clare Buswell's challenge to create a Quick and Easy Christmas card.

 I chose a dark green from the shattered collection for the background; ran it through an embossing folder and sanded. The deer and star are die cuts, one from shattered red and vintage yellow. Both sanded. Ribbon added and put onto base red card stock. Done and done!  Quick and Easy Peasy. 
Supplies Used:
Core'dinations shattered collection - dark green and red
Core'dinations vintage collection - yellow/gold
Bazzil - pomegranate card stock
Sizzix M/S Die - mini star 
Sizzix Die - reindeer flight
DCWV - adhesive ribbon

Core'dinations Christmas card #1

Hi hard core croppers,

I have two cards to submit for Clare Buswell's challenge for quick and easy Christmas cards.
 For this card I used whitewash with red core. Ran through an embossing folder and sanded. Wrapped metallic red thread around 4 times, added felt flowers/leaves and gems. Then adhered all to the pomegranate card stock.


Supplies Used:
Core'dinations whitewash with red core
Sizzix embossing folder
Hero Arts felt flowers/leaves
K&Co. gems
Bazzill - pomegranate card stock
On The Surface - ruby metallic thread 
Core'dinations sanding block, dust cloth

Core'dinations Patchwork Challenge

Hi hard core croppers,

It's getting down to the wire so getting my last challenges posted. I am submitting this card for Gail Linder's challenge to create a patchwork background. 

As soon as I read this challenge I thought of a hexigon punch that I haven't used in a while but one that creates some really cool designs. So, here is the card I made.
 I had such a hard time deciding on the card stock to use for this project as every stack that I have has such amazing coordinating colors. Finally I just said to myself.."OK, that's enough, it's going to be these four".  After the card was constructed I was very pleased with the combination. 
 The base was cut from shattered black (4 3/4" x 6 3/4"). The final card size is 5" x 7". I turned the black piece over, put on the scoreboard and scored all four sides at 1/8". I turned right side up and sanded to reveal the score lines. The colored card stock was put into 3 Sizzix and 1 Cuttlebug embossing folders, sanded and 4 chevrons punched from each color. I edged each chevron with black soot distress ink. I glued the chevrons onto the black base and then tied pewter metallic thread through the holes in tiny gray pearl buttons. Before adding the buttons to the panel I glued it to the base card stock.  
The sentiment was stamped on a piece of the base card stock, trimmed and popped onto the front. 
I will say this card took a good amount of time due to all the piecing of the chevrons but it was really a pleasure for me to do...kinda like putting a puzzle together :)   

Supplies Used:
Core'dinations shattered black 
Core'dinations TH kraft pack
Gina K pure luxury - moonlit fog
Emagination super giant chevron punch
TH Distress ink - black soot
Archival black ink
On The Surface -pewter metallic thread
Sizzix embossing folders
Cuttlebug embossing folder
Fraycheck - Dritz
Glass Garden Beads - tiny buttons
Core'dinations sanding block, dust cloth 

Core'dinations Banner Challenge

Wow, just received notice that my banner WON for the challenge. Thank you Margie and Core'dinations. 

Hi hard core croppers. 

Well, today is the last day to post challenge projects and I have been hard at work. This project is for Margie Higushi's challenge to create a shaped holiday banner. 


 Sitting on the mantle you can see the first Christmas card we always get from the Salvation Army.

I had never made a banner before so this was a real challenge for me. I knew it was going to take me a good amount of time so I designed the letters the night before while watching TV. I used shattered core'dinations in red and green, put each letter through my cuttlebug to emboss, sanded all and rubbed edges with vintage photo. I wanted a base for the letters so picked whitewash core'dinations with a red and green core but actually used the backs. I cut the starburst from 4 red and 3 green. The letters were attached to the starburst. I used a brush and glossy accents to "paint" the areas of the starburst that showed and sprinkled on old fashioned glitter.  Once dry the letters were taped to white seam binding.

Thanks for stopping by.

Supplies Used:   
Core'dinations shattered and whitewash card stock 
Core'dinations sanding block and dust cloth
My own letter design ~4 1/8" high
Sizzix starburst die
Sizzix embossing folder
Twinklets - old fashioned glitter
Glossy accents
Distress ink - vintage photo
Red line tape
White seam binding

Friday, November 8, 2013

Core'dinations Tag Times Two

Hi hard core croppers. Below is my submission to Katie Nolan-Denham's challenge..."my challenge for you is to make at least two tags. You MUST use Core'dinations visibly on your tags and you MUST stamp on your tags".  I hope you like my two tags; they were a blast to make.  The Thanksgiving one is to send as I made several of these for the holiday. OK, I'll send the other one to a special person as well.


The Thanksgiving tag background was made by rubbing distress inks, spritzing water and drying. Rub ink around all edges. All elements were die cut. The leaves were scrunched and then distressed with ink. When dry they were sprayed with pearl mist. The pumpkin was cut from scrapbook paper, lines bent and distressed. The sentiment was stamped onto the banner. The leaf and acorn at the bottom are the only items adhered flat onto the tag; the rest are popped up. Once all were added to the tag, distress stickles were applied here and there to the leaves and pumpkin. 


The holiday tag background was created with distress paint and water. Once dry it was put into an embossing folder and run through the Cuttlebug. The remainder of the elements were die cut. The trees were sanded and distressed with ink. The deer die cut was scrunched in my hands, opened, sanded and distressed with ink. I cut the deer four more times using a manilla folder, adhered all together to give lots of dimension. I used a Fantastix to rub the distress ink around all the edges of the deer once it dried. The moon was distressed and sprayed with pearl mist. The sentiment was stamped onto a torn tattered banner, scored and folded. Lastly, cording was tied and knotted to tag hole.

Supplies Used:
TH Kraft-Core Shattered Collection
Vintage Collection, Classic Sunshine
Whitewash collection 
Manilla #8 tag - A Stamp in the Hand
TH Distress ink - vintage photo, black soot, dried marigold
TH Distress stickles - rock candy
TH Distress paint - spiced marmalade, barn door, peeled paint, vintage photo
My Mind's Eye - twine
Manilla folder
BoBunny scrapbook paper
TH Alterations dies - tattered leaves, tattered banners pine tree, reindeer flight, mini M/S moon
QuicKutz banner
Ranger - Archival black ink, Perfect pearls mist in heirloom gold
Sentiments - sorry, don't know
Sanding block, dust cloth - Core'dinations
Sizzix holly embossing folder
Fantastix
Studio Calico - wood star

Core'dinations Thankful

Update: Just found out this card was picked as the winner for this challenge.  There were such wonderful submissions I can't believe it...pinch me....Thank you Vivian and Core'dinations. 

Hi hard core croppers. This is one of my Thanksgiving cards I'm sending out. I am submitting it to the Core'dinations crop/challenge from Vivian Keh who says: "feature core'dinations cardstock on your gratitude card/layout and use an autumn palette of colors".  So, here is what I made and hope you like it.


I envisioned the feathers to represent a turkey and the colors, of course, are autumn. The chipboard house represents family who gather to share what they are thankful for.

I cut watercolor paper for my background base. A gold gelato was applied to all edges, spritzed with water and my favorite tool...my finger...was used to move the pigment around. After drying, I stamped the background text, rubbed distress ink on all edges and stamped the sentiment. I die cut the feathers and embossed the majority of them but left some plain. The embossed feathers were sanded and rubbed with distress ink. The plain feathers were creased down the center and distressed with ink. All feathers were glued down. The house embellishment was colored with distress ink, hemp threaded through the four holes, tied at the back and glued down. The entire piece was adhered to brown card stock.  

Supplies used:
TH Kraft-core nostalgic collection colorcore cardstock
Watercolor paper
Chocolate brown cardstock
Faber-Castell Gelato- gold
TH Distress ink - vintage photo
Ranger - Archival black ink
Maya Road microchip button
Darice - 20lb hemp cord
Sizzix embossing folder
QuicKutz feather die
Art Impressions stamp
Sanding block, dust cloth - Core'dinations

Core'dinations Thinking of You

Hi hard core croppers. I am submitting this card for the crop/challenge from Tracy Gruber. Her challenge ".... create a project using your stamps and Core!"  This is my submission for this category....


The finished card is 5 x 7. I cut the card stock to size and then ran the card stock through the embossing folder and then sanded. I die cut the feather and inkwell. Packing tape was attached to the back of the die cut areas and then the piece turned right side up and glitter added to the sticky tape. I rubbed my finger over it a bit to make sure it was secure. The picture really doesn't give the sparkly look of the glitter. To give a bit more dimension I used pumice stone distress ink heavily on two opposite corners and lightly on the embossed images, sanded the image again and stamped the sentiment. The finished piece was then popped up onto a blue mat, mirri card and then gray card stock to complete. 

Supplies Used:
Vintage Collection, Classic Sunshine - Core'dinations colorcore cardstock 
Sizzix M/S die - mini inkwell/feather
Couture Creations - early songbird embossing folder
TH Distress ink - Pumice stone
Ranger - Archival black ink
Stampin' Up! - Thinking of You rubber stamp
Stampin' Up! - blue and gray cardstock 
Mirricard - Paper Cut
Packing tape
Martha Stewart - mica flake 
Art Institute Glitter - Cornflower opaque
Sanding block, dust cloth - Core'dinations

Core'dinations Holiday Tag

Hi hard core croppers. The tag I created is in response to Kerri's challenge "create a holiday tag using Core'dinations Cardstock". This is the tag I am submitting for this challenge and it SHOUTS holiday. Hope you like it. 


I went for the vintage feel so picked a kraft tag for the base. I rubbed the embossing folder with distress ink on the smooth side and ran it through my Cuttlebug. The two ornaments were die cut with the mini star placed in the middle first. Then I switched the colored stars and adhered each behind the openings and sanded each ornament. I also cut two more ornament tops using the same die from mirri card and glued to the tops. I used distress ink on the edges of the tag. I cut a paper clip in half and bent it to resemble an ornament hook. The green ornament was attached first. I tied a lace bow and adhered to the red ornament, then popped up and brought one tail of the bow through the tag hole. I wrapped tiny red tinsel to the bottom and stapled. The staples were colored red with a Sharpie. The wood embellishment was colored with walnut distress ink and attached to the bottom corner. 


Supplies Used:
TH Kraft-Core Shattered Collection Core'dinations cardstock in two colors
Cuttlebug embossing folder
TH Distress ink - fired brick, vintage photo
Ranger Inkssentials Kraft #8 tag
TH Alterations die - carved ornaments #2
TH mini M/S - star
TH mini red tinsel 
TH tiny attacher and staples
Prima wood embellishment
Paper Cut - Mirricard, gold & silver
TH Distress ink - pumice stone
Lace from stash
Paper clip
Sharpie
Round nose pliers
Sandpaper & dust cloth - Core'dinations 

Core'dinations Clean and Simple

Hi to all my hard core croppers out there.  Here is a card I am submitting to the Core'dinations challenge for Clean and Simple. Tami Mayberry initiated this challenge. I will admit, I have a hard time with this topic...just ask my friend Julie. She laughs every time I say I'm going to make a simple card and then I just keep adding :) Hope you like it.

 
I picked the card stock and ran it through the embossing folder for the background. Then die cut the hexagons using the same card stock and die cut the letters. I then sanded all, even the letters to reveal the coordinating core color. I used distress ink on the edges of the hexagons and background piece. I started with the base card and stamped the sentiment using my stamp positioner, then matted each layer of card stock to the latter. I laid out the hexagons so they were pleasing to my eye and popped two of them up for some dimension. Lastly, I glued on the letters...clean and simple :) 

Supplies used:
Vintage, Reminisce colorcore card stock
Black Magic, Hocus Pocus colorcore card stock
Sizzix swirly star embossing folder
TH Alterations Wanted alpha die strip
TH Distress ink - evergreen bough
Paper Cut - Mirri card, silver
Anchor Paper - Stardream card stock 
Impression Obsession - sentiment
Sanding block, dust cloth - Core'dinations

Give Thanks

Happy Friday!  

I have a Thanksgiving card to share today. 

It's so hard now days not to go straight to Christmas after Halloween. And no wonder with the merchandising hype well in the groove. My husband now calls Thanksgiving "the forgotten holiday". Isn't that a sad thought. I try not to forget about giving thanks and take a break from whatever is going on in my life and reassess my priorities. 

The card I created for you uses the wonderful StampTangle medium pumpkin. I say "medium" because there are three sizes to choose from. And, as always, three choices of mounting.  I colored the pumpkin with colored pencils, die cut a vine and used an autumn paper for the background. The sentiment also came with the autumn paper and was popped up before attaching. Gold colored adhesive gems were added to each side of the sentiment. All is mounted onto a sage green card after adding a 5/8" wide ribbon in matching green.


I will be showing you the largest pumpkin on my next post Nov 18. Hope you stop by. Check out the other new StampTangle holiday stamps at Just For Fun Rubber Stamps

Thanks for stopping by.  Linda


Wednesday, November 6, 2013

Core-dinations Hard Core Cropper in service....

Hi all,

I'm working on the Core-dinations Hard Core Crop running from Nov 1-Nov 10. I'll be posting submissions soon so please stand by..... thanks all. If you want to check out their crop and see what's going on, click HERE.

Friday, November 1, 2013

Miss You

I'm trying to think warm, spring, sunny.... ha,ha,ha.  I know, it's a lost cause in Wisconsin at this time of year, but oh well. This card was created using Just For Fun rubber stamps. It is hard to see in this pic, but the background is a resist. 


If you are in the Madison, WI area the weekend of Nov 15-17, Just For Fun will be represented at the OOAK Rubber Stamp Convention. Click HERE to check out the convention site. 

Stamps Used: 
StampTangle Hen G3693 
Miss You A3679
StampTangle Pattern Block J3713

Next Friday I'll have a Thanksgiving idea for you.
Thanks for stopping by... Linda K